時計の針、単純に太い線を描くだけというのも味はありますが、針っぽくしたいですよね。
watchfaces – simple_analog のソースを見てみますと、ヘッダに針の形状が定義されています。
static const GPathInfo HOUR_HAND_POINTS = {
  3, (GPoint []){
    {-6, 20},
    {6, 20},
    {0, -60}
  }
};
これだとよくわかりませんが、座標に描画してみると
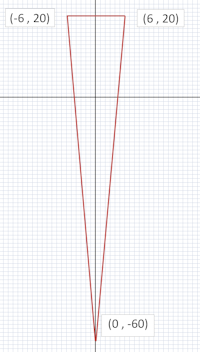
こうなりますね。短針の形です。プログラム的には、座標は上のほうがマイナス値になりますので、形は上下ひっくり返った、ちょうど12時を指す形になります。
これを描画するには、GPath を定義して
static GPath *s_hour_arrow;
先ほどのデータを読み込んでデータを作成し、
s_hour_arrow = gpath_create(&HOUR_HAND_POINTS);
描画する場所を指定しておいて、
gpath_move_to(s_hour_arrow, center);
枠線描画と
gpath_draw_outline(ctx, s_hour_arrow);
中身塗りつぶしができます。
gpath_draw_filled(ctx, s_hour_arrow);
あとは、これを回転できれば、どんな時刻でも表示できるというわけですね。
gpath_rotate_to(s_hour_arrow, TRIG_MAX_ANGLE * t->tm_min / 60);
回転は、関数が用意されていて、こういうかんじでいけます。
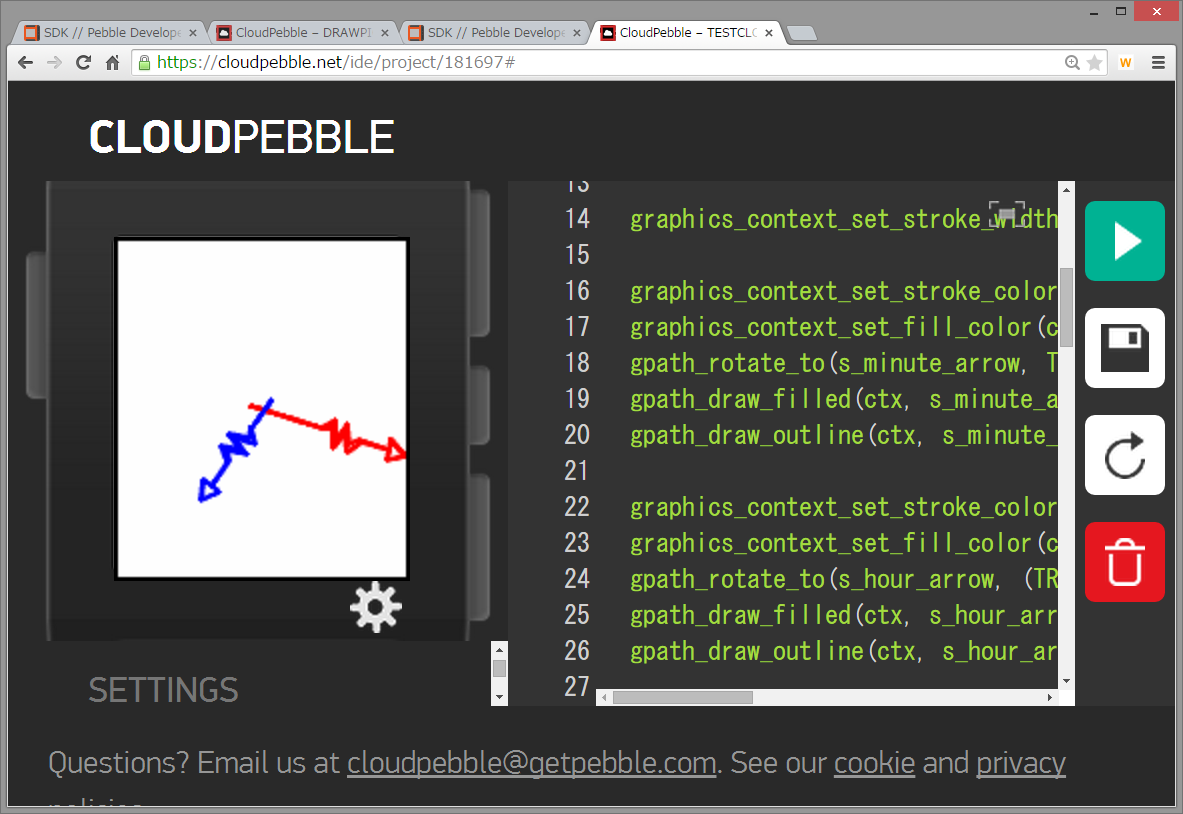
もうちょい複雑な形状の針を用意してみます。
main.h
#pragma once
#include <pebble.h>

static const GPathInfo HOUR_HAND_POINTS = {
  19, (GPoint []){
    {0, -55},    {6, -47},    {1, -47},    {1, -32},    {8, -27},
    {-3, -24},    {8, -20},    {-3, -17},    {1, -11},    {1, 7},
    {-1, 7},    {-1, -11},    {-7, -16},    {4, -20},    {-7, -23},
    {4, -27},    {-1,-31},    {-1, -47},    {-6, -47}
  }
};

static const GPathInfo MINUTE_HAND_POINTS = {
  19, (GPoint []){
    {0, -75},    {6, -67},    {1, -67},    {1, -52},    {8, -47},
    {-3, -44},    {8, -40},    {-3, -37},    {1, -31},    {1, 7},
    {-1, 7},    {-1, -31},    {-7, -36},    {4, -40},    {-7, -43},
    {4, -47},    {-1,-51},    {-1, -67},    {-6, -67}
  }
};
これを使って針を表示します。(ほとんど watchfaces – simple_analog そのまんまですが。)
main.c
#include <pebble.h>
#include "main.h"

static Window *s_main_window;
static Layer *s_image_layer;
static GPath *s_hour_arrow;
static GPath *s_minute_arrow;

static void drawArrow(Layer *layer, GContext *ctx)
{
  time_t now = time(NULL);
  struct tm *t = localtime(&now);

  graphics_context_set_stroke_width(ctx, 2);

  graphics_context_set_stroke_color(ctx, GColorRed);
  graphics_context_set_fill_color(ctx, GColorWhite);
  gpath_rotate_to(s_minute_arrow, TRIG_MAX_ANGLE * t->tm_min / 60);
  gpath_draw_filled(ctx, s_minute_arrow);
  gpath_draw_outline(ctx, s_minute_arrow);

  graphics_context_set_stroke_color(ctx, GColorBlue);
  graphics_context_set_fill_color(ctx, GColorWhite);
  gpath_rotate_to(s_hour_arrow, (TRIG_MAX_ANGLE * (((t->tm_hour % 12) * 6) + (t->tm_min / 10))) / (12 * 6));
  gpath_draw_filled(ctx, s_hour_arrow);
  gpath_draw_outline(ctx, s_hour_arrow);
}

static void layer_update_callback(Layer *layer, GContext* ctx) {
  drawArrow(layer, ctx);
}

static void handle_minute_tick(struct tm *tick_time, TimeUnits units_changed) {
  layer_mark_dirty(window_get_root_layer(s_main_window));
}

static void main_window_load(Window *window) {
  Layer *window_layer = window_get_root_layer(s_main_window);
  GRect bounds = layer_get_frame(window_layer);
  s_image_layer = layer_create(bounds);
  layer_set_update_proc(s_image_layer, layer_update_callback);
  layer_add_child(window_layer, s_image_layer);
}

static void main_window_unload(Window *window) {
  layer_destroy(s_image_layer);
}

static void init() {
  // Create main Window element and assign to pointer
  s_main_window = window_create();
  // Set handlers to manage the elements inside the Window
  window_set_window_handlers(s_main_window, (WindowHandlers) {
    .load = main_window_load,
    .unload = main_window_unload
  });
  // Show the Window on the watch, with animated=true
  window_stack_push(s_main_window, true);

  s_hour_arrow = gpath_create(&HOUR_HAND_POINTS);
  s_minute_arrow = gpath_create(&MINUTE_HAND_POINTS);

  Layer *window_layer = window_get_root_layer(s_main_window);
  GRect bounds = layer_get_bounds(window_layer);
  GPoint center = grect_center_point(&bounds);
  gpath_move_to(s_hour_arrow, center);
  gpath_move_to(s_minute_arrow, center);

  tick_timer_service_subscribe(MINUTE_UNIT, handle_minute_tick);
}

static void deinit() {
  // Destroy Window
   window_destroy(s_main_window);
}

int main(void) {
  init();
  app_event_loop();
  deinit();
}
これで実行!
いいですね。
せっかくなので、背景も付けてみましょう。
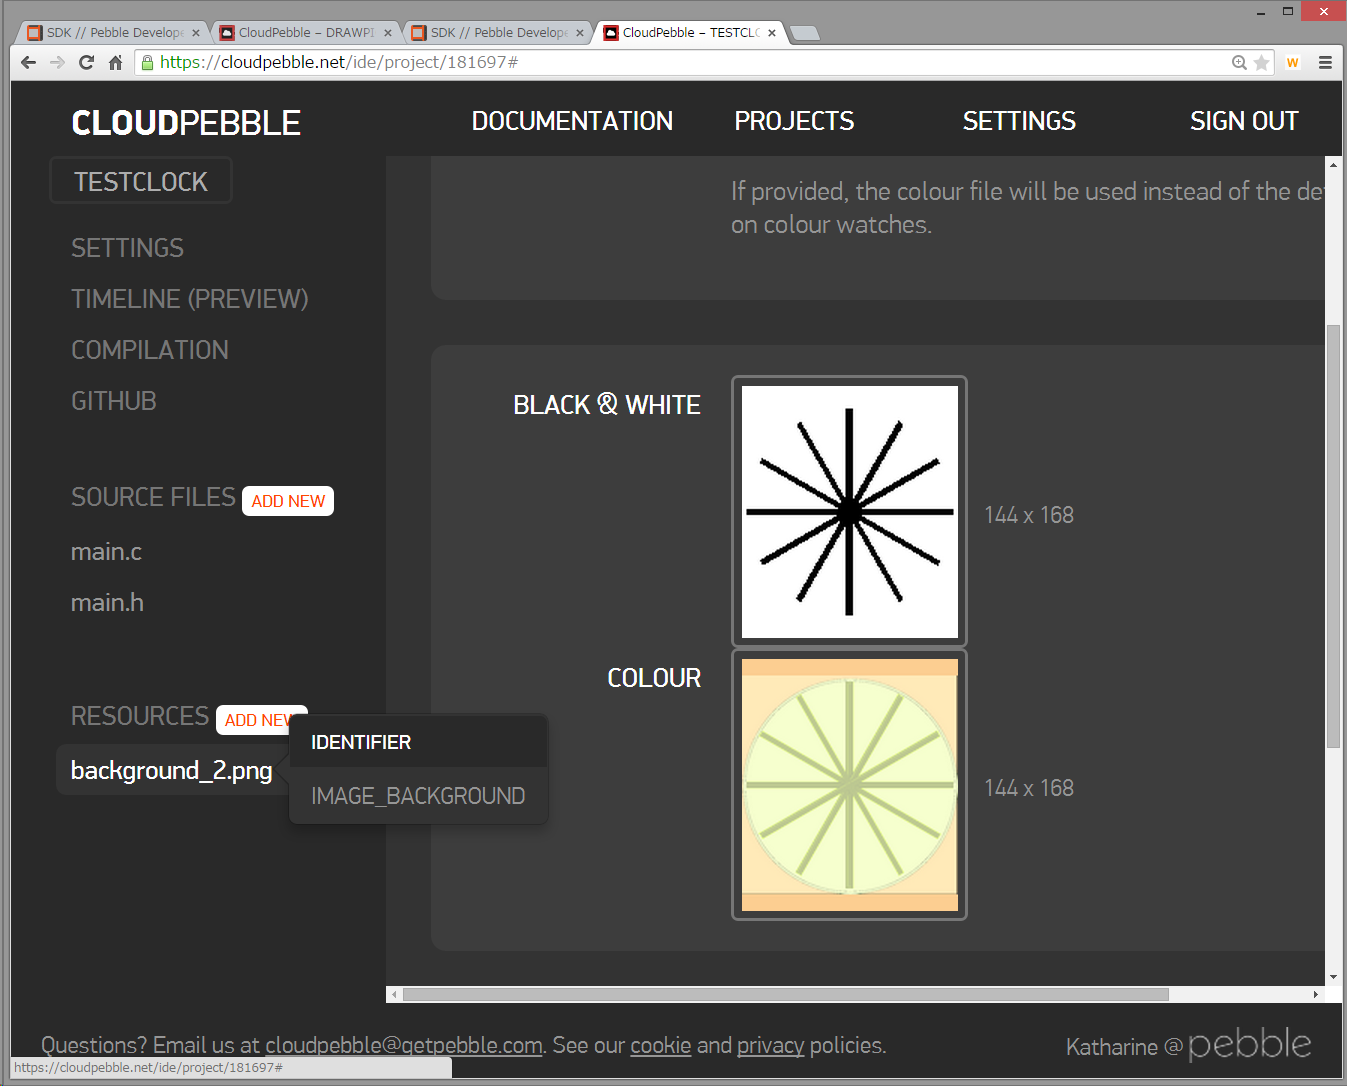
適当な画像を用意して…。あとは、Pebble 開発チュートリアル(2-2):ビットマップイメージでやった方法です。
画像リソースの登録。カラー版しか作らない場合も、白黒/カラー両方必要のようです。2値化した画像など用意しておきましょう。
BitmapLayerとGBitmapの定義
static BitmapLayer *s_background_layer;
static GBitmap *s_background_bitmap;
main_window_load での GBitmap と BitmapLayer作成
// Create GBitmap, then set to created BitmapLayer
s_background_bitmap = gbitmap_create_with_resource(RESOURCE_ID_IMAGE_BACKGROUND);
s_background_layer = bitmap_layer_create(GRect(0, 0, 144, 168));
bitmap_layer_set_bitmap(s_background_layer, s_background_bitmap);
layer_add_child(window_layer, bitmap_layer_get_layer(s_background_layer));
main_window_unload での GBitmapとBitmapLayer削除
  // Destroy GBitmap
  gbitmap_destroy(s_background_bitmap);
  // Destroy BitmapLayer
  bitmap_layer_destroy(s_background_layer);
そして実行。
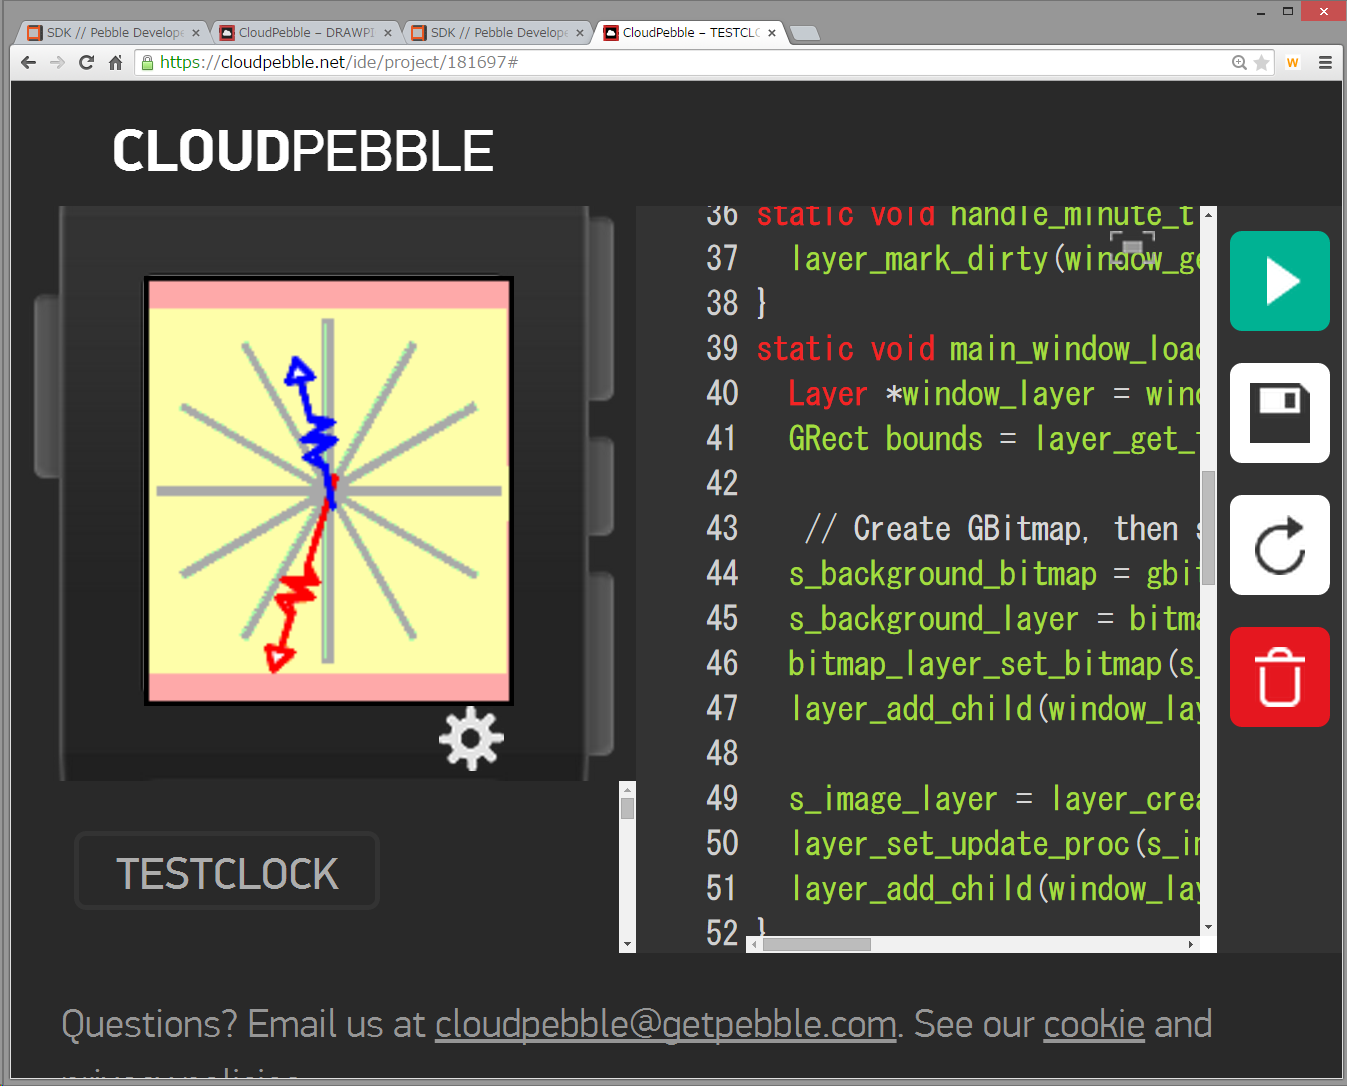
ここまでできれば、自分の好きな針の形、自分の好きな文字盤で、アナログ時計作成可能ですね。