アニメーションできるようになったので、前に作った時計に、アニメーションを用いた文字盤入れ替え機能を付けてみましょう。
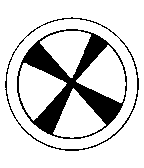
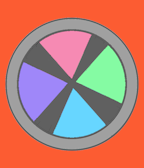
新しい文字盤を追加します。
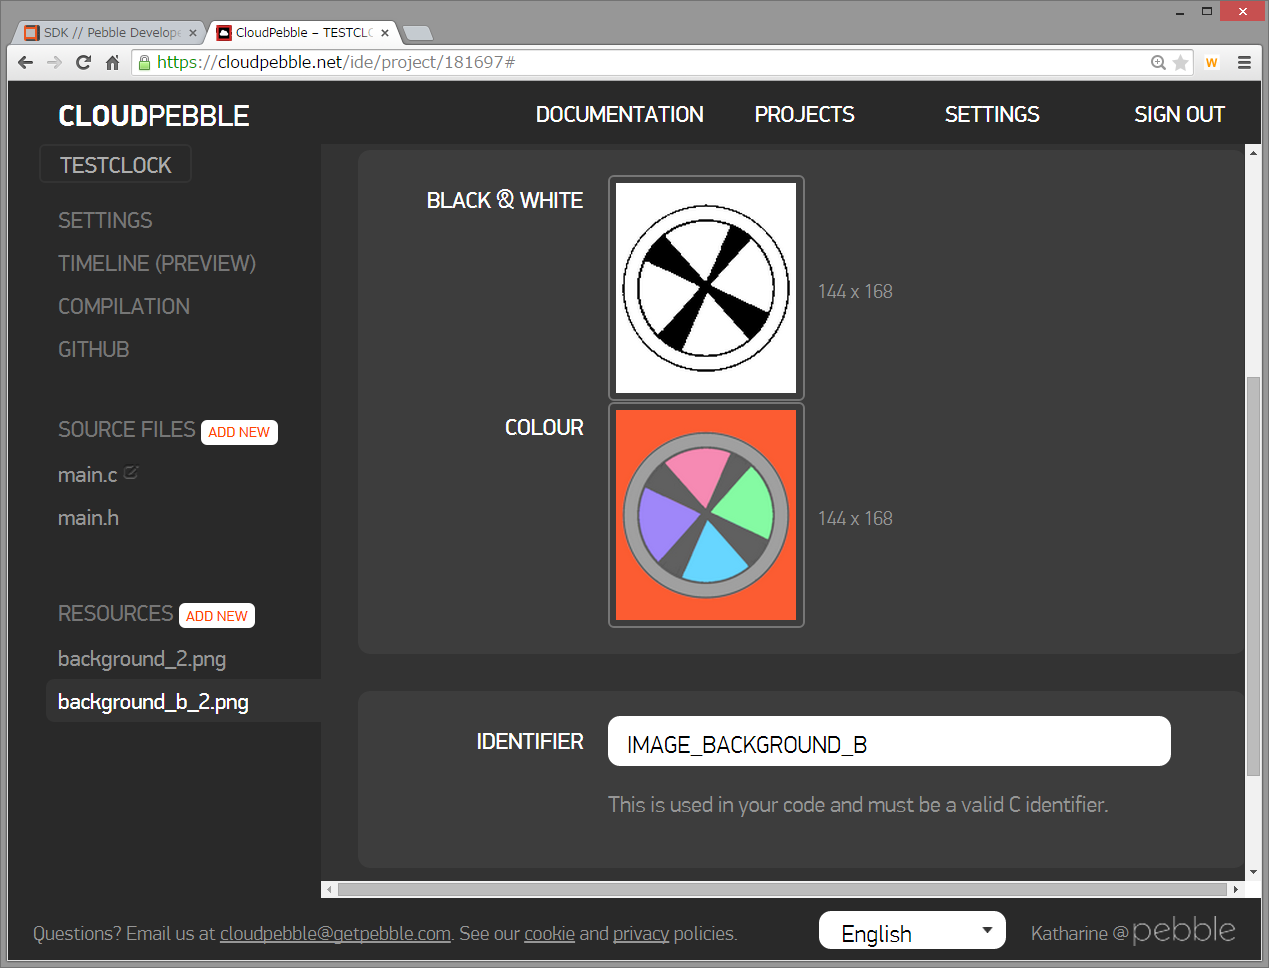
BitmapLayerとGBitmapを追加します。
static BitmapLayer *s_background_layer_b;
static GBitmap *s_background_bitmap_b;
画面の下部に隠れる位置で追加しときます。
// Create GBitmap, then set to created BitmapLayerB
s_background_bitmap_b = gbitmap_create_with_resource(RESOURCE_ID_IMAGE_BACKGROUND_B);
s_background_layer_b = bitmap_layer_create(GRect(0, -168, 144, 168));
bitmap_layer_set_bitmap(s_background_layer_b, s_background_bitmap_b);
layer_add_child(window_layer, bitmap_layer_get_layer(s_background_layer_b));
アニメーションはそれぞれのレイヤーごとに準備。
static PropertyAnimation *s_prop_animation_a;
static PropertyAnimation *s_prop_animation_b;
ボタンクリック時のハンドラを設定して
static void click_config_provider(void *context) {
  window_single_click_subscribe(BUTTON_ID_UP, click_handler);
  window_single_click_subscribe(BUTTON_ID_SELECT, click_handler);
  window_single_click_subscribe(BUTTON_ID_DOWN, click_handler);
}
init() でそれを登録。
window_set_click_config_provider(s_main_window, click_config_provider);
ハンドラでアニメーションを設定します。
static void click_handler(ClickRecognizerRef recognizer, void *context) {
  Layer *layer_a = bitmap_layer_get_layer(s_background_layer);
  Layer *layer_b = bitmap_layer_get_layer(s_background_layer_b);

  destroy_property_animation(&s_prop_animation_a);
  destroy_property_animation(&s_prop_animation_b);

  //s_toggle = true : layer A -> B
  //s_toggle = false : layer B -> A
  GRect rect_high = GRect(0, -168, 144, 168);
  GRect rect_mid = GRect(0, 0, 144, 168);
  GRect rect_low = GRect(0, 168, 144, 168);
  s_toggle = !s_toggle;
  if(s_toggle){
    s_prop_animation_a = property_animation_create_layer_frame(layer_a, &rect_mid, &rect_high);
    s_prop_animation_b = property_animation_create_layer_frame(layer_b, &rect_low, &rect_mid);
    APP_LOG(APP_LOG_LEVEL_INFO, "layer A -> B");
  }else{
    s_prop_animation_a = property_animation_create_layer_frame(layer_a, &rect_low, &rect_mid);
    s_prop_animation_b = property_animation_create_layer_frame(layer_b, &rect_mid, &rect_high);
    APP_LOG(APP_LOG_LEVEL_INFO, "layer B -> A");
  }
  animation_set_duration((Animation*) s_prop_animation_a, 1000);
  animation_set_duration((Animation*) s_prop_animation_b, 1000);

  animation_schedule((Animation*) s_prop_animation_a);
  animation_schedule((Animation*) s_prop_animation_b);
}
「画面の上」「画面の真ん中(表示エリア)」「画面の下の座標」を設定します。
レイヤー位置を「真ん中→上」 に動かして画面から出ていく動きになり、 「下→ 真ん中」に動かして画面に入ってくる動きになります。これで入れ替えアニメーションを表示します。
アニメーションの削除の「destroy_property_animation」は、前回のをそのまま使ってます。
ソース全体は下記のようになります。main.h は「チュートリアルの先へ(3) :かっこいい時計の針を書く」と同じです。
main.c
#include <pebble.h>
#include "main.h"

static Window *s_main_window;
static Layer *s_image_layer;
static GPath *s_hour_arrow;
static GPath *s_minute_arrow;

static BitmapLayer *s_background_layer;
static GBitmap *s_background_bitmap;

static BitmapLayer *s_background_layer_b;
static GBitmap *s_background_bitmap_b;

static PropertyAnimation *s_prop_animation_a;
static PropertyAnimation *s_prop_animation_b;

static int s_toggle;

static void drawArrow(Layer *layer, GContext *ctx)
{
  time_t now = time(NULL);
  struct tm *t = localtime(&now);

  graphics_context_set_stroke_width(ctx, 2);

  graphics_context_set_stroke_color(ctx, GColorRed);
  graphics_context_set_fill_color(ctx, GColorWhite);
  gpath_rotate_to(s_minute_arrow, TRIG_MAX_ANGLE * t->tm_min / 60);
  gpath_draw_filled(ctx, s_minute_arrow);
  gpath_draw_outline(ctx, s_minute_arrow);

  graphics_context_set_stroke_color(ctx, GColorBlue);
  graphics_context_set_fill_color(ctx, GColorWhite);
  gpath_rotate_to(s_hour_arrow, (TRIG_MAX_ANGLE * (((t->tm_hour % 12) * 6) + (t->tm_min / 10))) / (12 * 6));
  gpath_draw_filled(ctx, s_hour_arrow);
  gpath_draw_outline(ctx, s_hour_arrow);
}

static void layer_update_callback(Layer *layer, GContext* ctx) {
  drawArrow(layer, ctx);
}

static void handle_minute_tick(struct tm *tick_time, TimeUnits units_changed) {
  //layer_mark_dirty(window_get_root_layer(s_main_window));
  layer_mark_dirty(s_image_layer);
}

static void destroy_property_animation(PropertyAnimation **prop_animation) {
  if (*prop_animation == NULL) {
    return;
  }

  if (animation_is_scheduled((Animation*) *prop_animation)) {
    animation_unschedule((Animation*) *prop_animation);
  }
  property_animation_destroy(*prop_animation);
  *prop_animation = NULL;
}

static void click_handler(ClickRecognizerRef recognizer, void *context) {
  Layer *layer_a = bitmap_layer_get_layer(s_background_layer);
  Layer *layer_b = bitmap_layer_get_layer(s_background_layer_b);

  destroy_property_animation(&s_prop_animation_a);
  destroy_property_animation(&s_prop_animation_b);

  //s_toggle = true : layer A -> B
  //s_toggle = false : layer B -> A
  GRect rect_high = GRect(0, -168, 144, 168);
  GRect rect_mid = GRect(0, 0, 144, 168);
  GRect rect_low = GRect(0, 168, 144, 168);
  s_toggle = !s_toggle;
  if(s_toggle){
    s_prop_animation_a = property_animation_create_layer_frame(layer_a, &rect_mid, &rect_high);
    s_prop_animation_b = property_animation_create_layer_frame(layer_b, &rect_low, &rect_mid);
    APP_LOG(APP_LOG_LEVEL_INFO, "layer A -> B");
  }else{
    s_prop_animation_a = property_animation_create_layer_frame(layer_a, &rect_low, &rect_mid);
    s_prop_animation_b = property_animation_create_layer_frame(layer_b, &rect_mid, &rect_high);
    APP_LOG(APP_LOG_LEVEL_INFO, "layer B -> A");
  }
  animation_set_duration((Animation*) s_prop_animation_a, 1000);
  animation_set_duration((Animation*) s_prop_animation_b, 1000);

  animation_schedule((Animation*) s_prop_animation_a);
  animation_schedule((Animation*) s_prop_animation_b);
}

static void click_config_provider(void *context) {
  window_single_click_subscribe(BUTTON_ID_UP, click_handler);
  window_single_click_subscribe(BUTTON_ID_SELECT, click_handler);
  window_single_click_subscribe(BUTTON_ID_DOWN, click_handler);
}

static void main_window_load(Window *window) {
  Layer *window_layer = window_get_root_layer(s_main_window);
  GRect bounds = layer_get_frame(window_layer);

   // Create GBitmap, then set to created BitmapLayer
  s_background_bitmap = gbitmap_create_with_resource(RESOURCE_ID_IMAGE_BACKGROUND);
  s_background_layer = bitmap_layer_create(GRect(0, 0, 144, 168));
  bitmap_layer_set_bitmap(s_background_layer, s_background_bitmap);
  layer_add_child(window_layer, bitmap_layer_get_layer(s_background_layer));

   // Create GBitmap, then set to created BitmapLayerB
  s_background_bitmap_b = gbitmap_create_with_resource(RESOURCE_ID_IMAGE_BACKGROUND_B);
  s_background_layer_b = bitmap_layer_create(GRect(0, -168, 144, 168));
  bitmap_layer_set_bitmap(s_background_layer_b, s_background_bitmap_b);
  layer_add_child(window_layer, bitmap_layer_get_layer(s_background_layer_b));

  s_image_layer = layer_create(bounds);
  layer_set_update_proc(s_image_layer, layer_update_callback);
  layer_add_child(window_layer, s_image_layer);
}

static void main_window_unload(Window *window) {

  //Destroy Animation
  destroy_property_animation(&s_prop_animation_a);
  destroy_property_animation(&s_prop_animation_b);

  // Destroy GBitmap
  gbitmap_destroy(s_background_bitmap);
  gbitmap_destroy(s_background_bitmap_b);

  // Destroy BitmapLayer
  bitmap_layer_destroy(s_background_layer);
  bitmap_layer_destroy(s_background_layer_b);
  layer_destroy(s_image_layer);
}

static void init() {
  // Create main Window element and assign to pointer
  s_main_window = window_create();
  window_set_click_config_provider(s_main_window, click_config_provider);
  // Set handlers to manage the elements inside the Window
  window_set_window_handlers(s_main_window, (WindowHandlers) {
    .load = main_window_load,
    .unload = main_window_unload
  });

  // Show the Window on the watch, with animated=true
  window_stack_push(s_main_window, true);

  s_hour_arrow = gpath_create(&HOUR_HAND_POINTS);
  s_minute_arrow = gpath_create(&MINUTE_HAND_POINTS);

  Layer *window_layer = window_get_root_layer(s_main_window);
  GRect bounds = layer_get_bounds(window_layer);
  GPoint center = grect_center_point(&bounds);
  gpath_move_to(s_hour_arrow, center);
  gpath_move_to(s_minute_arrow, center);

  tick_timer_service_subscribe(MINUTE_UNIT, handle_minute_tick);
}

static void deinit() {
  // Destroy Window
   window_destroy(s_main_window);
}

int main(void) {
  init();
  app_event_loop();
  deinit();
}
動かしてみます!
いいかんじ!
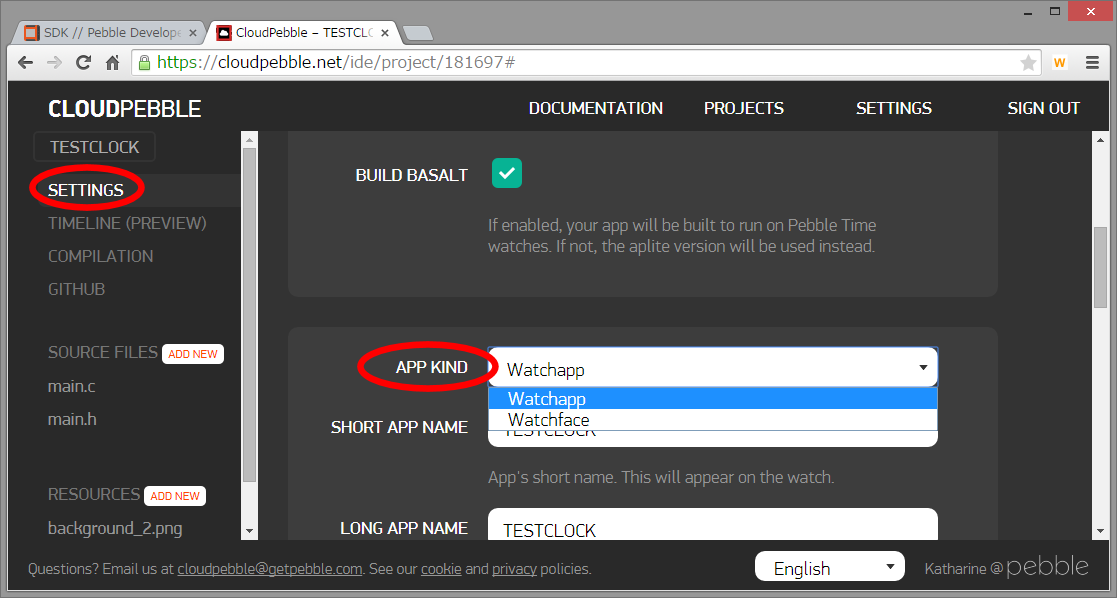
注意!:ボタン操作を有効にするには「SETTING」で「APP KIND」を「Watchface」→「Watchapp」にする必要がありました。じゃあこの時計、Watchfaceで使えないじゃん、ということになってしまうのですが、まあ、それはそれで!
ボタン使えないってことは、Watchfaceでユーザが何か操作したいときどうすればいいのかといいますと、Pebble側の答えとしては、Clicksに書いてあるように
Watchfaces cannot use the buttons to interact with the user. Instead, you can use the AccelerometerService.
「Accelerometer(加速度計)Service使ってねー。」ってことでした。デジタル時計でよくある「ボタン押したときだけ日付表示に切替」みたいなのやりたかったんだけどなー。Pebble Timeの操作方法(Past/Present/Future)を考えると、確かにクリックをWatchfaceで拾うのは無理なんだけども、長押しとかは取れるようになってたらいいのにな。
→どうやら、ボタン長押しは、ユーザが指定したアプリを起動するランチャーに割り当てられているようですね。なるほど、よく考えられてる。
ユーザでの操作ができなかったとしても、今回の文字盤入れ替えアニメは、昼と夜で自動的に文字盤入れ替える、っていうのができそうですね。
「うまくいった、ヤッタヤッター」て思ってログ見ると、なんか変なのが出てました。
[INFO] main.c:77: layer A -> B
[ERROR] animation.c:76: Animation 300000002 does not exist
[ERROR] animation.c:76: Animation 300000003 does not exist
[INFO] main.c:81: layer B -> A
[ERROR] animation.c:76: Animation 300000004 does not exist
[ERROR] animation.c:76: Animation 300000005 does not exist
[INFO] main.c:77: layer A -> B
[ERROR] animation.c:76: Animation 300000006 does not exist
[ERROR] animation.c:76: Animation 300000007 does not exist
[INFO] main.c:81: layer B -> A
なんじゃこれは。animation.cってのはシステム内部側の処理だな。どう見てもdestroy_property_animationの処理でエラーだよなあ…。
ソースパクリ元の「feature_property_animation.c」で確認したところ、こっちでも出てたようでした。(それでもアプリが落ちないってことはシステム側で落ちないようにしっかりチェック入ってるんだな。)
検索してみたところ、Developer Forumで話題が出ていました。Basalt 向けコンパイルだと、Animationは完了で自動的に破棄されるので、Destroy しなくていいよー、ってことらしい。なんだと!
そのかわり、繰り返しの使用ができないので、同じアニメーションをリピートしたい時とかは、毎回アニメーション作成するか、単純繰り返しなら、カウント指定の新しい関数(animation_set_play_count)を使えとのこと。
ApliteとBasalt の両対応したい場合、アニメーション処理それぞれ考慮しないといけないのですね。(僕はBasalt専用で書くので気にしないですけども。)
この件は、納得しました。destroy_property_animation のとこは削除しときましょう。
2つ以上のアニメーションを同時に動かすには、animation_spawn_create を使うのがいいようです。その他にも、アニメーションを連続で実行したり、逆再生の動きをさせたりする仕組みもありますね。